This Zion National Park itinerary is designed to help visitors plan an adventure-filled trip in a short period of time. Read on to discover how to navigate the park, things to do, learn about the main attractions, hikes, restaurants and places to stay. Feel free to substitute any of the recommendations listed below on this itinerary to suit your personal situation.
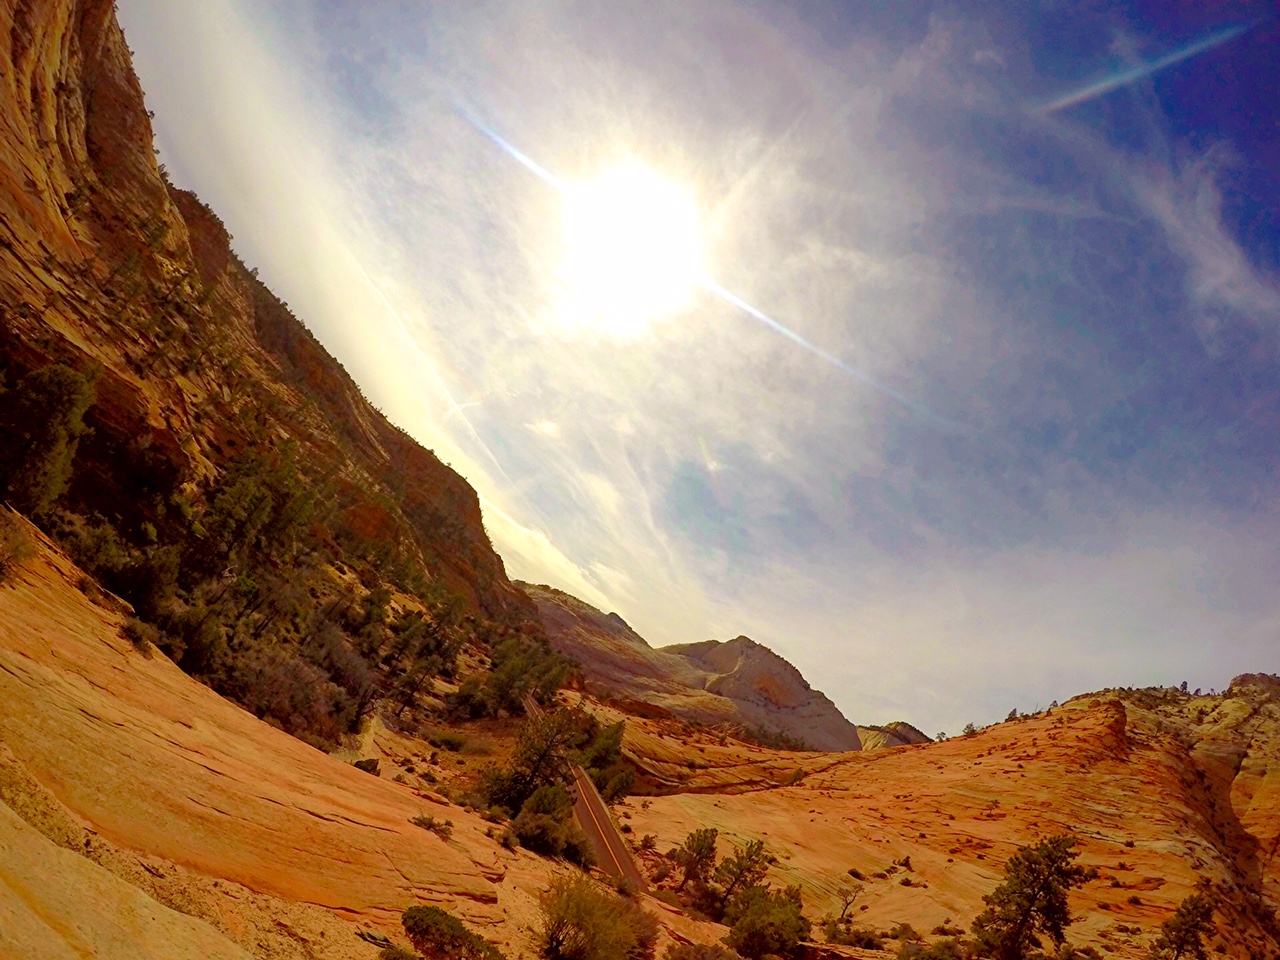
Zion National Park in Southwestern Utah is an other-worldly region, almost mystical. The landscape here is one of the most unique in the world, carved out largely by millions of years of erosion courtesy of the now sporadically flowing Virgin River. Zion sits at substantial elevation, with the lowest point in the canyon resting at 3,666ft. The highest point in the park is found at Horse Ranch Mountain, which sits at 8,726ft.
IN THIS GUIDE:
- Day 1
- Day 2
- Day 3
- Day 4
- When To Visit
- What To Pack
- Dining
- Where To Stay
- Tours, Sandboarding & Canyoneering Experiences
- …and more
- Pin This Zion Itinerary for Later on Pinterest
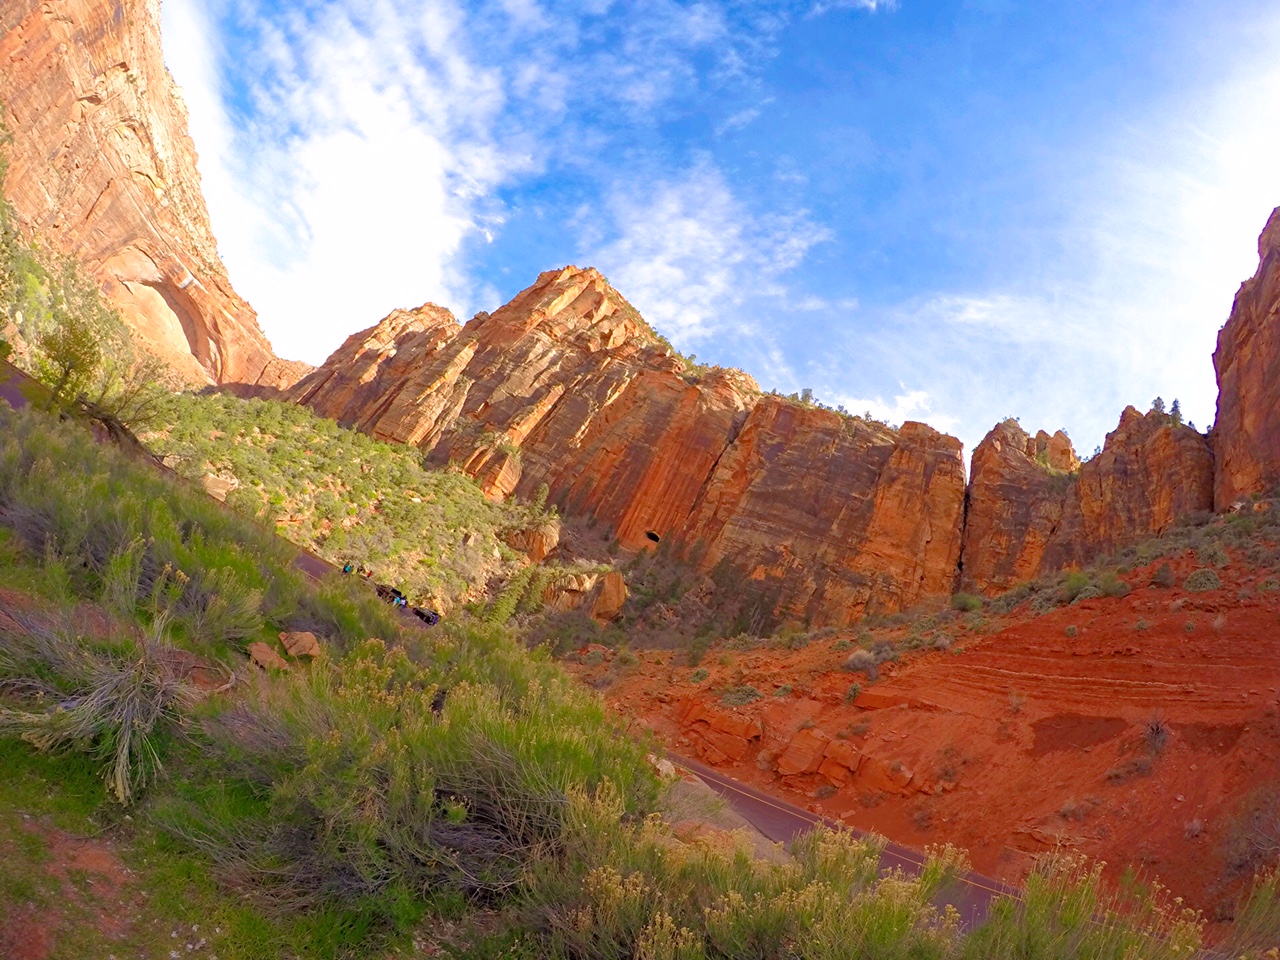
Zion National Park gets its unique red, orange, pink, white and black rock colors from a variety of minerals. However, it’s the dominant presence of iron that gives the sandstone in the region its signature red and pink hue.
The region is said to have been settled as far back as 8,000 years ago by nomadic native tribes, and more recently by the Paiute Indians. Many of the trails and park areas are named after Paiute words and phrases. There is also an abundance of wildlife and a diverse array of plant species in the area. If you visit, keep your eyes to the sky for eagles, hawks, owls and dozens of species of bats. On the ground, look for deer grazing along the scenic roads and trails, gray foxes, and at higher elevation, bighorn sheep.
You should be here, and I’m going to help you make it happen. On a budget or not, this place is accessible and any discerning travel enthusiast should visit it in his or her lifetime.
RELATED: 10 Top US National Parks To Visit Depending on Season
Day 1 – Getting to Zion National Park
Today you’ll be doing a bit of traveling. Whether you’re coming from across the pond or taking a domestic flight, Zion isn’t too far from one relatively large international airport and famous city — Las Vegas (LAS – McCarran International Airport). This airport is hands down your best bet in terms of proximity and cost-effectiveness, but it also offers a beautiful drive to the park.
I recommend utilizing a credit card rewards portal or travel booking service to book your flight, such as Chase Ultimate Rewards (credit card required). This will ensure you’re not only getting the best price, but also can help you accrue, or spend rewards points.
In terms of ideal airlines, domestic carriers like JetBlue & Southwest offer some of the most cost-effective one-way and round-trip routes to get to Zion National Park. You can also search on Kayak to view all of the best airline deals for your travel dates and get updates as they arise.
Once you’ve landed, the easiest, and most fun way to get to Zion National Park is by rental car (click to browse options). You’ll be flying into Las Vegas, and the choice is yours as to whether or not you want to take this opportunity to hit the strip while you’re there. Take a look at available hotels for your travel dates here.
I recommend Thrifty as a rental car service, only because they’ve most recently offered the best rates on SUVs out of LAS. Their loyalty program (BlueChip) offers expedited service including having your car ready in the lot. Renting a car through Thrifty’s BlueChip program also lets you accrue American, JetBlue and Southwest Airlines points.
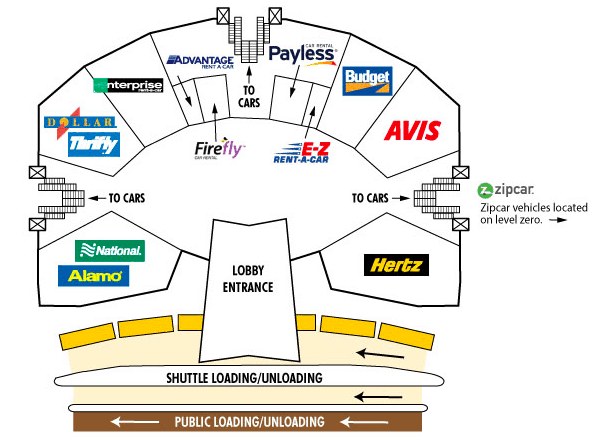
Just note that the rental car center at McCarran is offsite, so you’ll need to take a shuttle to pick up your car. Other car companies include but are not limited to Budget![]() , Alamo, Hertz, Dollar, Enterprise, and National. See a map of the Rental Car Center just outside McCarran International Airport to the right.
, Alamo, Hertz, Dollar, Enterprise, and National. See a map of the Rental Car Center just outside McCarran International Airport to the right.
All in all, it will take about 2 and 1/2 hours from the time you leave the airport to the time you enter Springdale, the town right next to Zion National Park. There are a plethora of accommodation options you can utilize, and we’ll get into that further on in this article.
Day 2 – First Day Exploring Zion National Park
Depending on what time of day you arrive in Las Vegas on Day 1, you can substitute some of these “Day 2” activities where you see fit. Day 2, for the most part, is designed to get you acclimated to Zion and the town of Springdale. You’ll have an opportunity to drive around, get the lay of the land, try out some restaurants and participate in some of the easier, more convenient hikes.
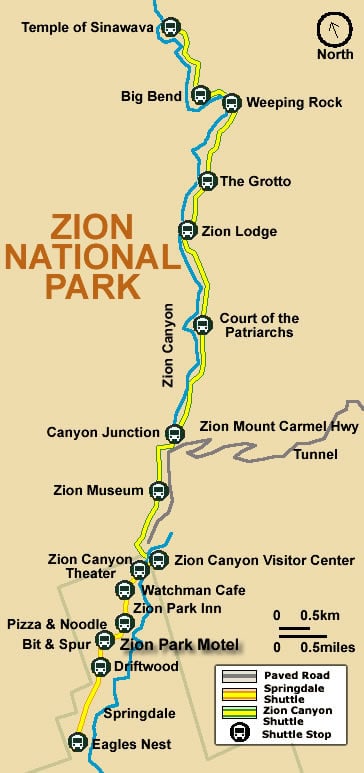
Navigating Zion Nation Park – Understanding the Shuttle System and Getting into the Park
You might be asking yourself why you need to take a shuttle when you have a car. Firstly, it’s more efficient. Bus stops just outside the park and within Springdale (where you’ll be staying), dot the main road almost every quarter mile.
Secondly, you’ll need to take a shuttle to access the main attractions, hikes and main canyon road. Personal vehicles are not permitted on the bus route within the park.
To get access to the park, hop on one of the shuttles that stop at any number of the hotels along the main road within Springdale. They come and go in both directions about every 10 minutes. Ride this shuttle to the Visitor’s Center. Exit the bus and proceed straight to the park entrance, where you’ll be purchasing your park pass.
Note that you can also drive your rental car directly to the Visitor’s Center and park there at no charge. Keep in mind that the lot fills up quickly.
Personal vehicle and park entrance passes last for a full 7 days and cost $30. If you don’t want to purchase a vehicle pass, individual passes cost $12 and last for 7 days as well. Purchase your pass at the entrance and keep it on you at all times in a secure spot in your bag.
Once you’ve got your park pass, proceed past the entry point and begin to head left. You’ll soon be jumping on another shuttle bus which takes visitors to and from all of the 9 shuttle stops within the park.
Note that the buses within the park arrive at the Visitor’s Center and all of the park’s 9 main stops about every 4 minutes. They seat about 60 people. Don’t be intimidated if the line to board the shuttle is long. Zion is a popular National Park, but given the frequency at which the buses arrive and how many people they hold, even very long lines typically don’t last for over 10 minutes. In order to beat the crowds, however, it’s recommended you get an early start to your day, between 6:00 am and 8:00 am, preferably.
Embarking on Your First Hike through Zion National Park
Lower Emerald Pools: .6 miles one-way | 30 minutes | 69ft uphill climb
Middle Emerald Pools: 1 mile one-way | 1 hour | 150ft uphill climb
Upper Emerald Pools: 1.5 miles one-way | 1 1/2 hours | 350ft uphill climb
Entry Point: Zion Lodge (Shuttle Stop 5)
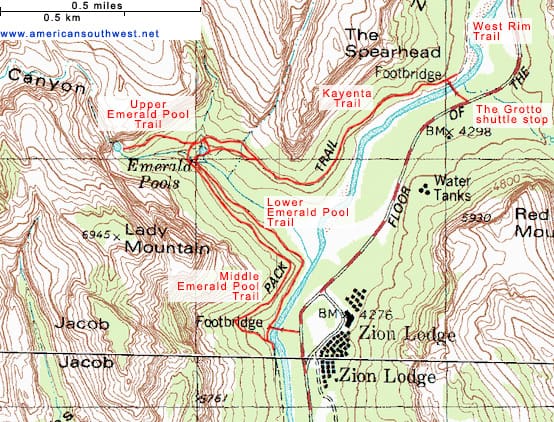
In theory, you could begin with any hike that your heart desires on Day 2. However, we opted for one of the easier and less strenuous, yet quite beautiful hikes that Zion offers. Essentially allowing us to get our feet wet. That hike begins with the Lower Emerald Pools trailhead.
Easily accessible from Shuttle Stop Number 5 — Zion Lodge — the Lower Emerald Pools trail begins across the street and over the bridge from where you’re let off.
This hike is suitable for families, couples and or children. It’s roughly a 70-foot elevation gain to the Lower Emerald Pools. Once you’ve reached that point, another short distance with an additional gradient of 150ft will lead to the Middle Emerald Pools. Continue past this spot and gain another 200ft of elevation and you’ll arrive at the Upper Emerald Pools. If you proceed all the way to the Upper Emerald Pools, it’s about a 3-mile round-trip hike to make it back down to the bottom.
Note that both the Middle and Upper trails have a steeper gradient and are slightly more difficult than the lower trail. The round-trip hiking time for this trail is roughly 3 hours depending on your pace.
Hike The Grotto
If time permits or you simply have nothing else to do, we highly recommend continuing onto The Grotto trail from the Emerald Pools. As you can see, the Lower Emerald Pools trail connects with The Grotto. The difficulty on this trail is rated as easy, and it’s a short 1-mile round-trip largely shaded hike.
Less than halfway through, if you look South, you’ll be presented with a beautiful view of the lower Zion Canyon.
Hike Weeping Rock
If you’ve completed both The Emerald Pools and Grotto hikes, Weeping rock is one short shuttle ride Northeast. This hike is about as easy as it gets, and it’s a short half mile round-trip.
Weeping Rock offers hikers an opportunity to see hanging gardens and a large rock face that appears to ‘weep’ at all times throughout the year. The water from the spring seeping through the sandstone is ancient, and took around 1000 years to traverse the porous rock. Hikers can sit beneath the falling water droplets and gaze South, down the canyon. It’s really a very peaceful and therapeutic scene and vibe.
Once any of the above hikes are completed, simply walk back across the main Zion Canyon road and catch a shuttle from Zion Lodge, The Grotto or Weeping Rock to head back to the Visitor’s Center.
From the Visitor’s Center, you can either walk back to your hotel (many are within half a mile), or catch the free town shuttle back to your stop in Springdale. Scroll down for our recommended eateries.
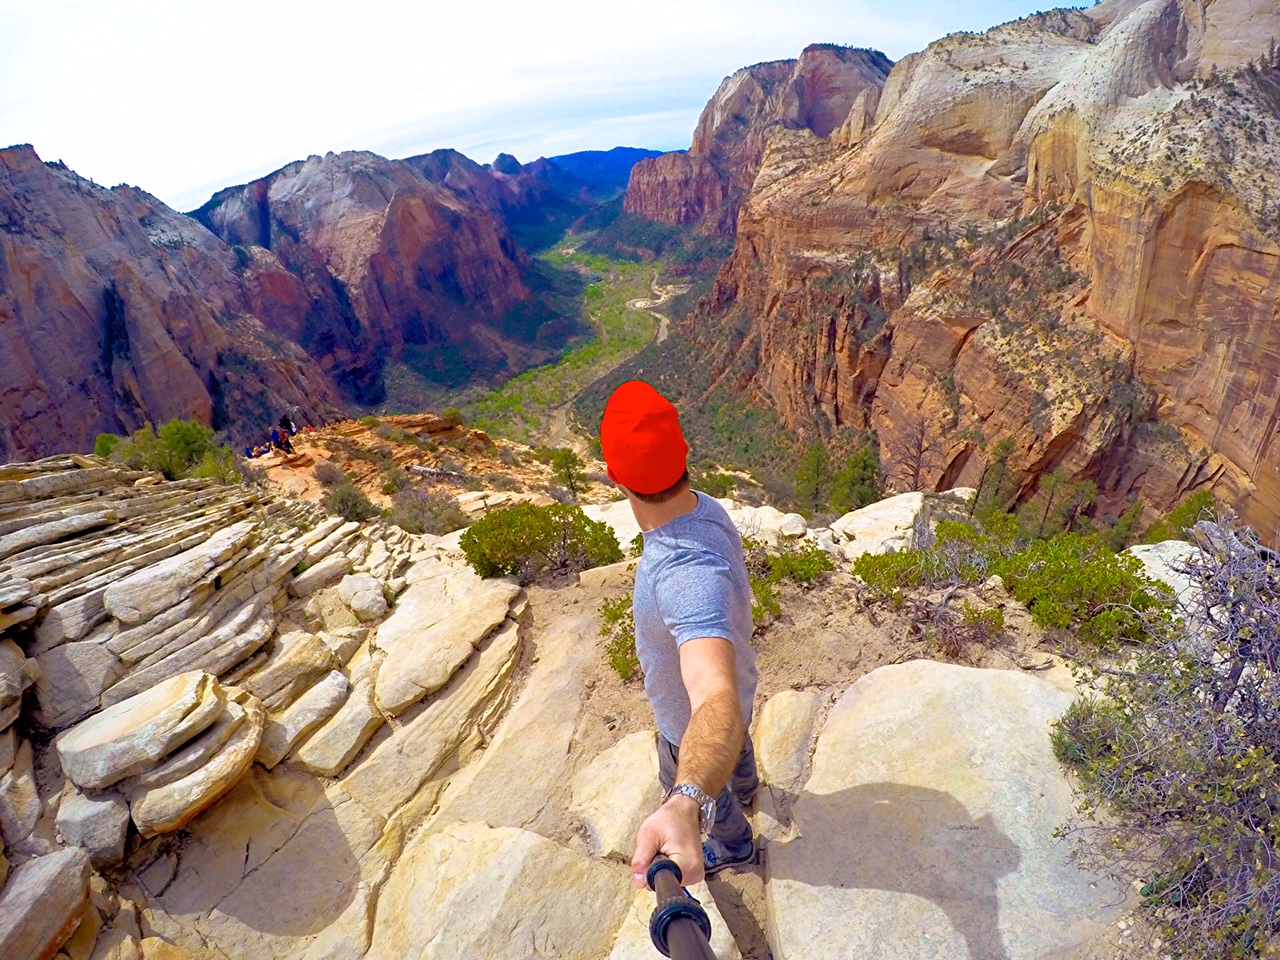
Day 3 – Hiking Angel’s Landing
Trail Distance: 5 miles round trip
Hiking Time: 5 hours (avg)
Entry Point: The Grotto (Shuttle Stop 6)
Warning: This hike is NOT for those who are out of shape, have balance issues, or have a serious fear of heights. People have died.
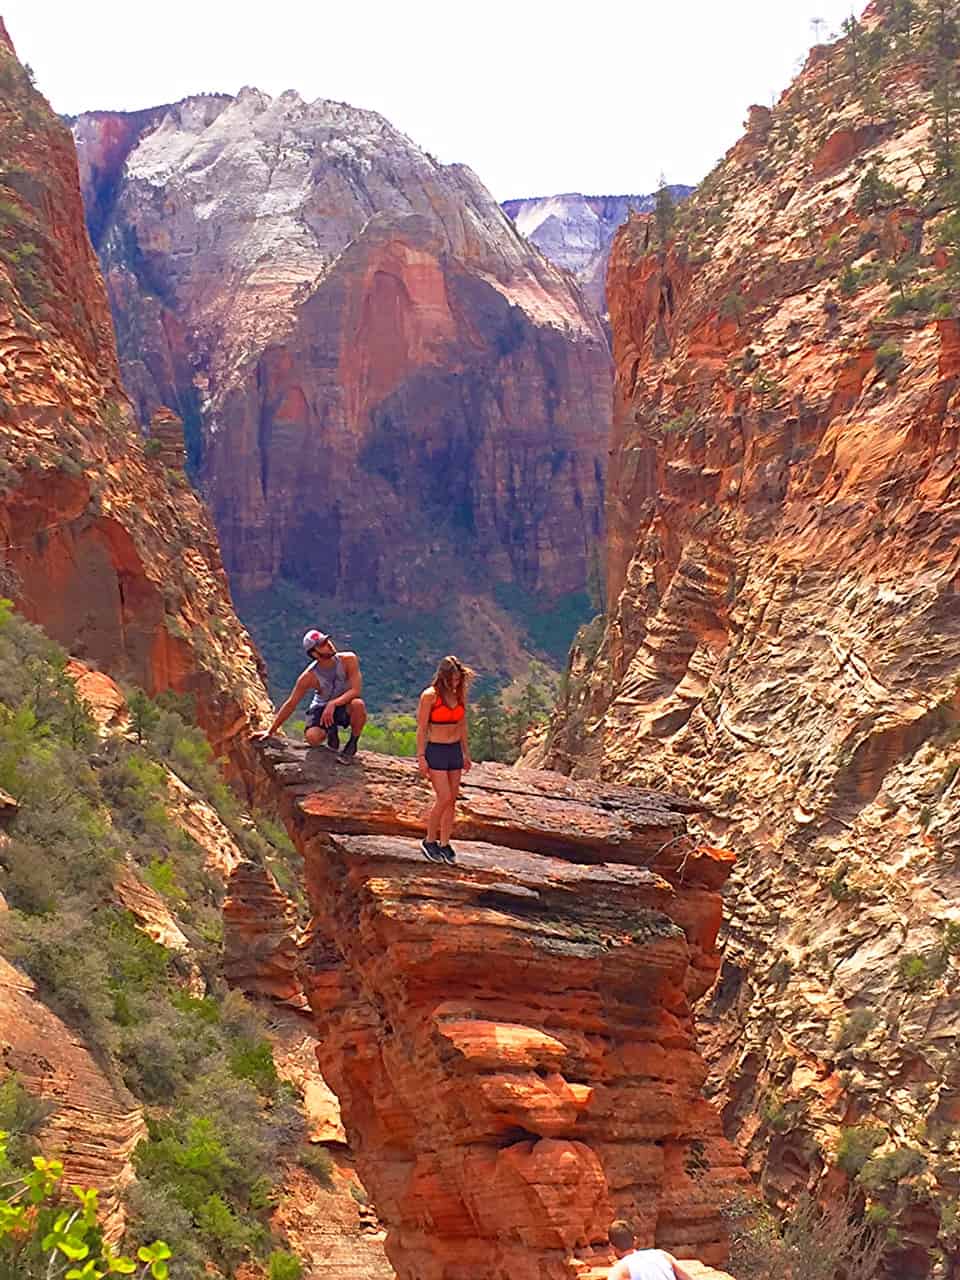
I’m going to preface this hike with my personal experience. After 5 of the scariest but most rewarding hours of my life, we finally made it to the top of Angel’s Landing in Zion. This hike was no joke. At 5,790+ feet, it’s well over a mile high with an incredibly steep gradient. Climbing the rock formations towards the end to get to this point were in some cases slimmer than the length of my foot. One misstep or misplaced hand, you die. But if you brave it to the top, you get rewarded with this view… (above and right)
You’ll be starting this trail from The Grotto (Stop 6 via Zion Shuttle Bus). It will take you about 2 miles to get to the first summit.
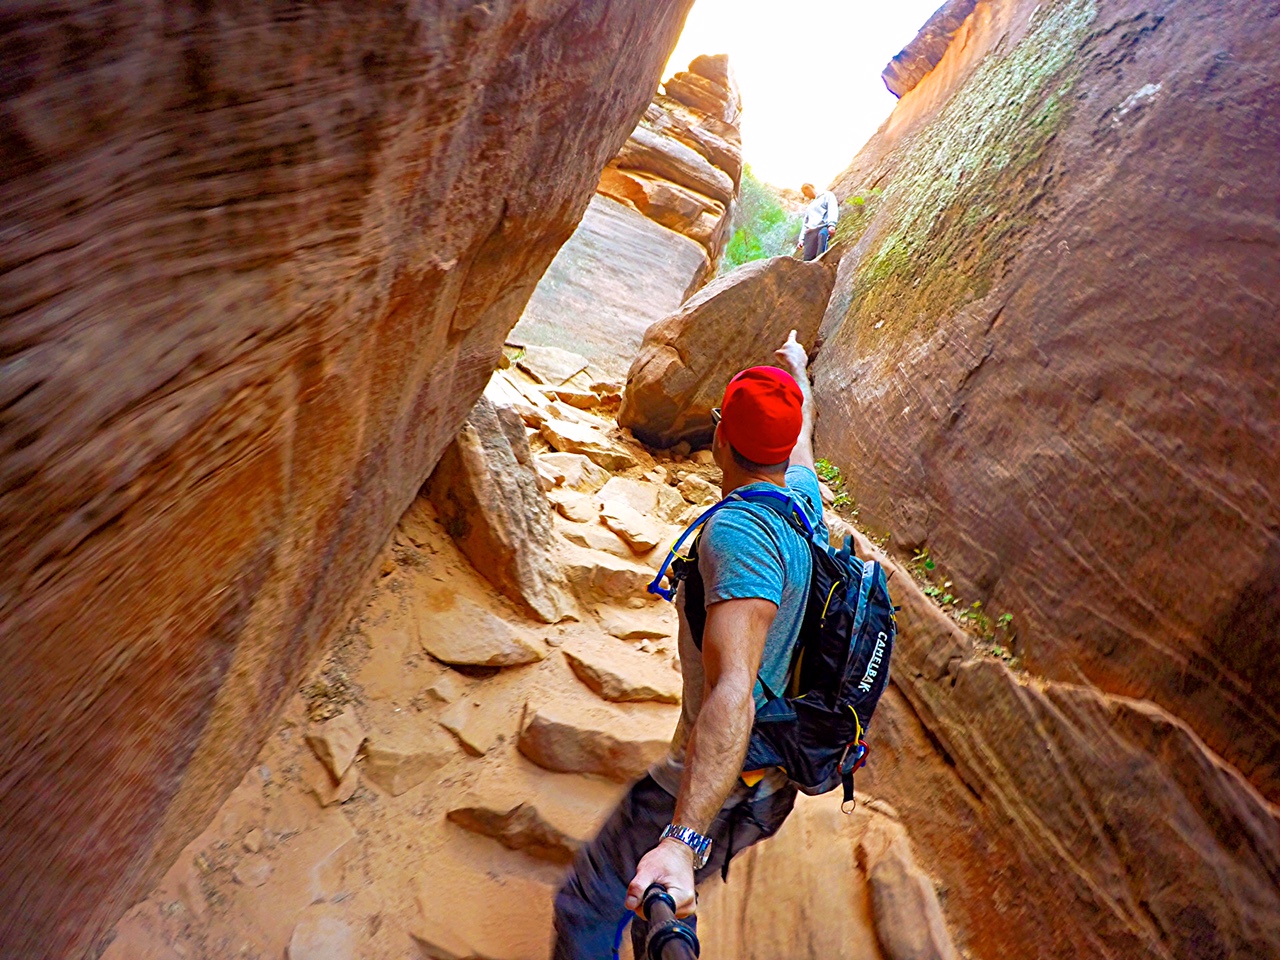
Angel’s Landing is rated one of the 10 most dangerous hikes in the world. That’s because after a strenuous 2-mile uphill climb (though mostly paved), you now have less than a half a mile to the “summit”. It’s not until this point that the hike begins to get difficult. If you made it this far, you’re sitting on a sandy plateau catching your breath and drinking some water.
But you’re not done. Now, you get to traverse sandstone rock structures that will make your hair stand on end. And they should. For the next half mile, your conditioning, foot placement and hand placement may determine whether or not you survive the next hour of your life. You’re going to have to leave behind the well-manicured, paved trail and trade it for a sheer cliff.
Luckily, much of the remaining trail now has well-positioned chains that allow for an easier climb through the difficult and dangerous junctures. A significant number of people were dying on a yearly basis until these were put in place. Now that the chains are there, it’s been over 5 years since there’s been a death. Note, however, that you are NOT tethered, so your safety really relies on how much you “grab, grab, grab.” Try not to look down, and take it one step at a time.
Take a Scenic Drive
So you’ve just finished Angel’s Landing. You’re either feeling elated, tired or racked with fear. Possibly a combination of all three. In any case, you’re probably in the mood to take it down a notch and digest everything you just went through. A good way to go about this is to explore outside the main canyon road by car.
A short drive up from Canyon Junction (Shuttle Stop 2) lies Zion Mount Carmel Highway. Proceed up the highway East along the winding roads. Eventually, you’ll hit your first tunnel carved directly through the sandstone. Drivers are required to turn their headlights on as there is no lighting inside the tunnel. It takes about 2 minutes to go through. When you come out, you’ll soon go through one last dark, but much shorter tunnel. At the end, you’ll pass a ranger post that doesn’t require a stop.
Now, get ready to experience a true feeling of freedom. This is one of the most scenic drives you’ll ever take. The roads will continue to wind in switchback style through the pink canyons and rock structures. There are plenty of small alcoves where you can park your car on the side of the road to get out and explore by foot (highly recommended!). One highlight includes Checkboard Mesa near the park exit. You’ll understand the name once you see it.
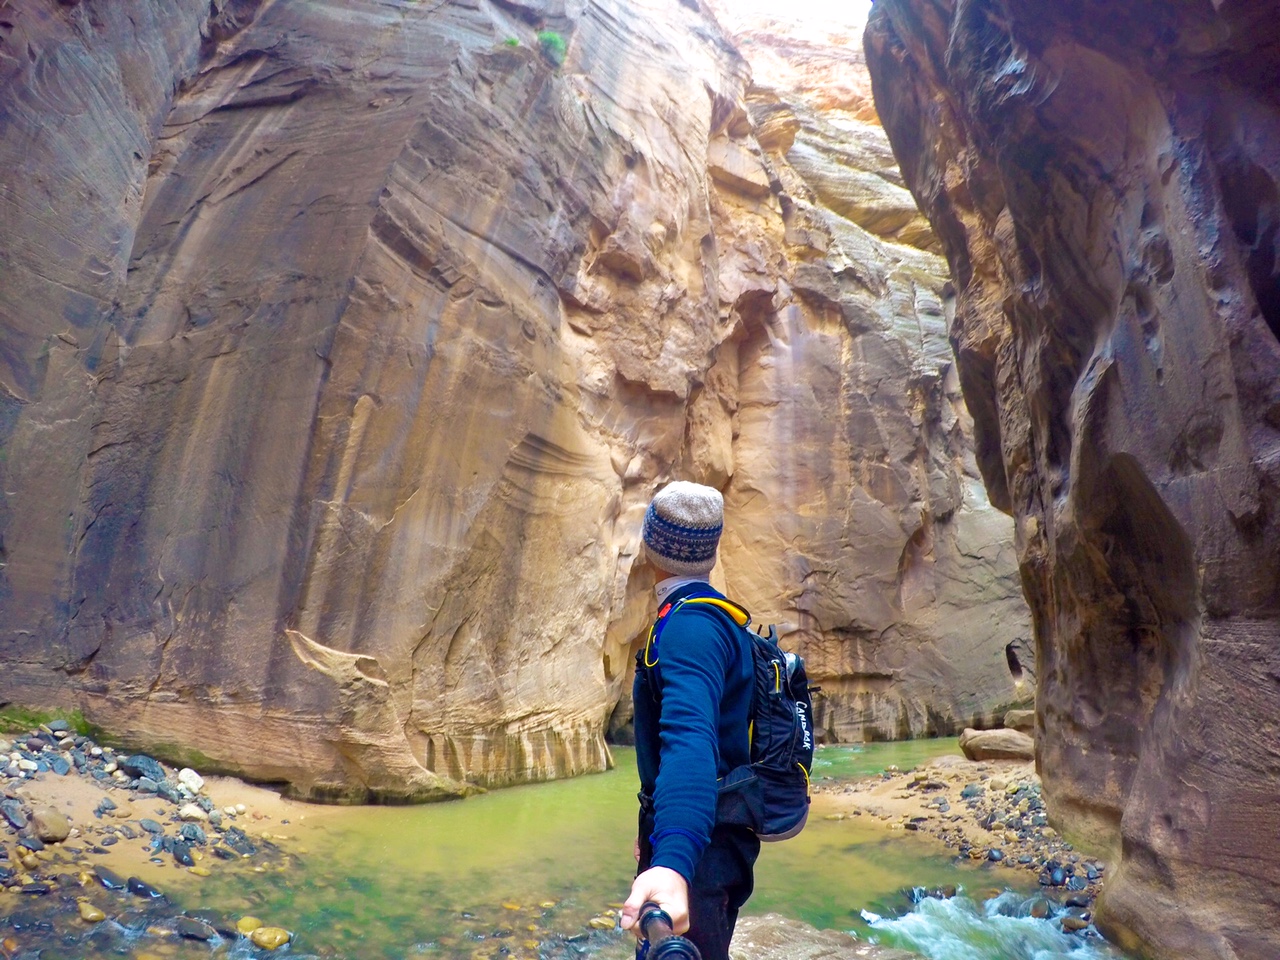
Day 4 – Hiking The Narrows in Zion National Park
Trail Distance: 4-10 miles
Hiking Time: 4-10 hours
Entry Point: Temple of Sinawava (Shuttle Stop 9)
This was the highlight of my trip. The Narrows is one of the most unique and beautiful hikes you could ever hope to embark on. This hike really doesn’t occur on a “trail,” you actually navigate the Virgin River herself.
Head upstream as much as 10 miles and you’ll be exposed to dramatic canyon walls and glistening water caressing the smooth and colorful stones. Just be sure you watch your footing. This hike isn’t too difficult, though at some points where the water is high it can certainly knock you over if you don’t watch your footing.
During the Spring, the water level here can be somewhat elevated due to meltwater coming down from higher elevations. It changes day by day, so be sure to check the water levels and ensure they aren’t over 150CFS as the trail will be closed if it is. Note that during the Summer, flash floods can occur and it’s important you don’t get caught in the middle of one.
You can hike The Narrows at any time of year, though late spring and throughout the summer tend to bring the most crowds (April – November is peak season).
Note that if you do hike The Narrows during the Winter or Spring months, the water can get quite cold. In late March, it was only 40 degrees Fahrenheit.
The water level can also come up as high as your waist. That being said, you’ll definitely need waterproof hiking shoes, neoprene socks, dry pants and a walking stick. Some hikers even prefer wearing a dry suit. These items can be purchased before your trip, or you can rent them at a number of stores just outside the park entrance. We used Zion Adventure Company and they were incredibly knowledgeable. We rented the dry pants “package” for around $43. The package includes neoprene socks, fantastic waterproof hiking shoes, dry pants and a walking stick. Other packages are available, including dry suits and dry bags, among other gear.
Hike Hidden Canyon
Trail Distance: 2 miles round trip
Hiking Time: 3 hours
Entry Point: Weeping Rock (Shuttle Stop 7)
If you’ve completed The Narrows and still have some time to kill, hop back on the bus at The Temple of Sinawava and get off again at Weeping Rock. From here, you can take the fork right and proceed to Hidden Canyon.
This hike is relatively strenuous, beginning with steep uphill switchbacks. Eventually, the paved trail will end and you can begin the trek through the final dirt portion. The trail gets a bit more difficult here as you’ll be walking along cliff faces. While this part can be intimidating, there are chains you can grab hold of as you continue up the trail.
There are some areas throughout the Hidden Canyon trail where you can leave the main trail and explore some less-blazed routes with few to no people. Note that some portions of this trail can be dangerous, reminiscent of Angel’s Landing with steep ledges. If you fall you won’t survive. Keep this in mind and don’t overdo it if you’re tired, out of shape or have a fear of heights.
When To Visit Zion National Park
Zion National Park is open to the public year-round. Autumn and late Spring are some of the best seasons to visit the park as they offer cooler temperatures and beautiful colors. However, they can also be relatively popular seasons.
Personally, I’d avoid visiting Zion in the Summer because it can be oppressively hot. I wouldn’t want to hike Angel’s Landing with more people and sweat dripping down my eyes.
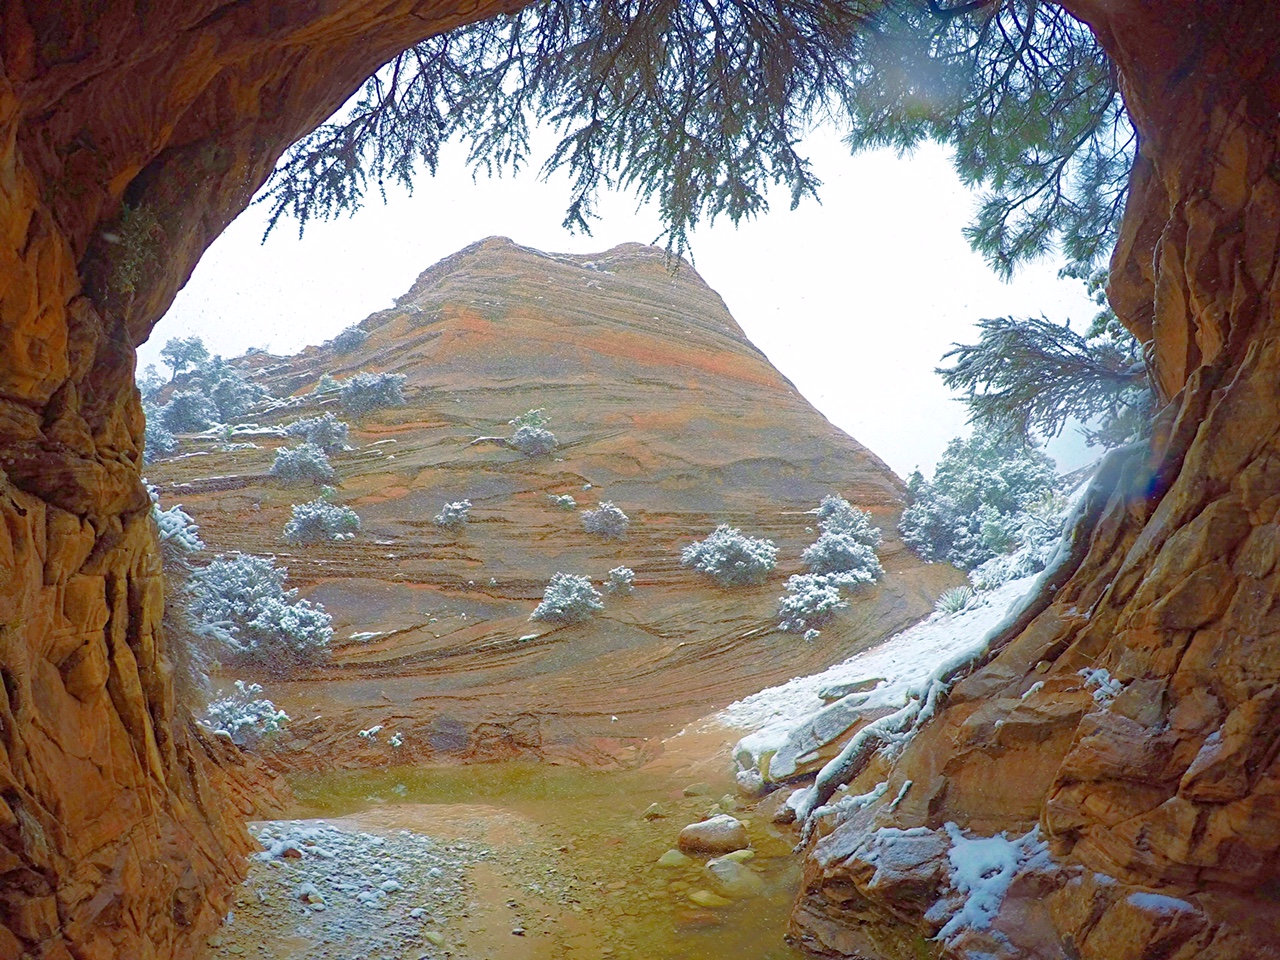
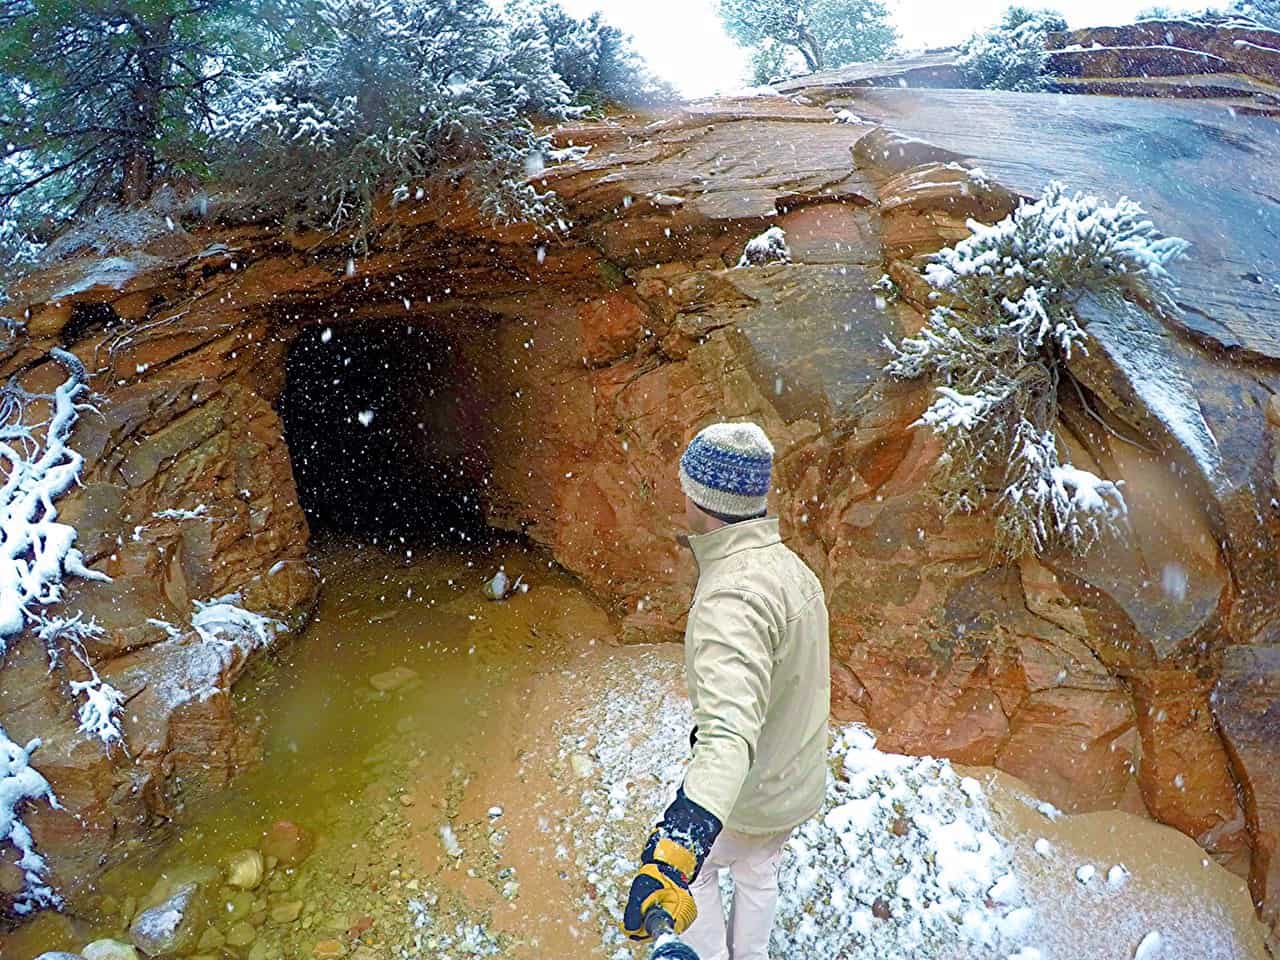
If you’re a fan of cooler temperatures, Winter is a beautiful season to visit the park. The weather can be a bit more unpredictable, so you’ll want to be prepared with an SUV. Make sure you pack plenty of layers.
Again, the largest crowds will be present in Zion between April and November.
What to Pack for Zion National Park
This varies dependent by season. See below for suggested items to pack. Items marked with (R) can be rented at Zion Adventure Company, which we recommend unless you already own these items. Any items rented from Zion Adventure Co must be returned by 7 in order to avoid a late fee. Note, these are the bare necessities, pack anything else you think you may want or need — especially a camera!
Side note: I carry a durable and affordable Water Buffalo Hydration Backpack with at least a 2-liter water bladder with me at all times when I’m out in the wild. It’s the perfect companion for housing my camera equipment and other essentials while keeping me hydrated all day.
Spring:
- Insulated, light jacket or fleece for the mornings and evenings
- Gloves
- Warm hat
- T-shirts
- Pair of shorts
- Pairs of pants
- Long sleeve shirts (to layer if needed)
- Bathing suit
- Hiking Boots
- Sneakers
- Water shoes/sandals (R)
- Neoprene socks (R)
- Dry pants (R)
- Walking stick (R)
- Drybag (R)
- Hydration Backpack or Water Bottle (R)
- Apple AirPods with Charging Case
Summer:
- Windbreaker
- T-shirts
- Shorts
- Bathing suit
- Hiking shoes
- Water shoes/sandals (R)
- Pair of light pants
- Walking stick (R)
- Drybag (R)
- Hydration Backpack or Water Bottle (R)
Fall:
- Fleece or insulated windbreaker
- T-shirts
- Shorts
- Bathing suit
- Hiking shoes
- Water shoes/sandals (R)
- Pairs of pants
- Walking stick (R)
- Drybag (R)
- Hydration Backpack or Water Bottle (R)
Winter:
- Winter coat
- Gloves
- Wool hat
- Long johns
- Long sleeve shirts
- Bathing suit
- Wool socks
- Hiking shoes
- Water shoes/sandals (R)
- Pairs of pants
- T-Shirt
- Neoprene turtle neck
- Walking stick (R)
- Drysuit (R)
- Drybag (R)
- Hydration Backpack or Water Bottle (R)
Where to Eat in Zion National Park
There are several highly rated restaurants you should check out during your visit to Zion. Whether you’re eating breakfast, lunch or dinner, good food is easy to come by and not too pricy. The service was exceptional while we were at these joints. The majority of these restaurants are in Springdale, just outside the Southern entrance to the park grounds.
Utah Drinking and Eating Fact: In order to drink alcohol at a restaurant, you’ll need to order food. It’s a real law. You’re unfortunately not able to walk into a place and buy a beer or order a glass of wine without ordering some form of food. If everyone is on the same tab, you can cheat the system and just order an appetizer. If you’re on individual tabs, each person will need to order something to eat if they want to also drink.
Breakfast
MeMe’s takes the cake for the best breakfast spot in Zion National Park. The atmosphere was inspired by various European creperies, and MeMe’s serves up some of the best-tasting crepes, omelets, sandwiches and paninis in all of Springdale. The wait staff is incredibly friendly and accommodating, and prices are more than modest. A must-try!
This place has something for everyone. From incredible Apple Pie to Elk Burger’s (yes, I said Elk Burger) to milkshakes and tacos. Blondie’s has a laid-back, homey atmosphere with friendly service and fair prices. Just make sure you don’t go at peak times as it can be difficult to find a seat.
I’m mentioning this restaurant twice because their breakfast food is delicious and the portions are quite large. Stop by Oscar’s before your morning hike and grab the “Lean Hikers Burrito” or the “Pork Verde Burrito.” The coffee and pancakes are also great and the prices are cheap.
Lunch and Dinner
Bit & Spur Restaurant & Saloon
This was our favorite place to have dinner. We ate here on two separate occasions. A unique combination of Southwestern cuisine and Mexican-style dishes, the portions here are large and the food is fantastic. Try the Pork Carnitas Burrito or mix and match your favorite Taco’s & Enchiladas. The service is also stellar, though keep in mind between 7 and 8:30 pm it can get quite crowded. Seats can sometimes be found in the bar area if you don’t want to wait for a table. The wine list changes periodically, though they had some nice Syrah and red blends while we were there. Bottles in some cases were under $ 30. Take a virtual tour!
Wildcat Willies Ranch Grill & Saloon
Done in a Western-style aesthetically but also from a culinary perspective, this place is a great option to grab a beer and a burger. Good service, great-tasting and hearty meals. Click the link above to take a look at the menu.
This is one of the most highly rated, and ironically enough, most popular/crowded restaurants in Springdale. If you’re going to make an attempt at the Pizza & Noodle Co, go right after it opens around 4:00 pm, or after 9:00 pm.
Oscar’s is a great breakfast and lunch spot. They offer great dinner food as well, but unfortunately, the place closes by 9 pm so we had difficulty making it here some days. The breakfast burritos and omelets are fantastic, but it’s their burgers that stand out for me. The fish tacos, avocado burger, blue bacon burger and murder burger will make you miss Zion National Park almost as much as the landscape.
Grocery Items
If you’re eating breakfast at your hotel and want to supplement the continental buffet, there are a number of markets just outside the park entrance in Springdale that sell groceries and other essentials. We used Sol Foods Groceries & Hardware. They sell a variety of groceries and produce (some even organic) and also have a deli where you can design your own sandwich. We picked up some sandos from Sol’s and brought them with us on The Narrows hike.
Where to Stay in Zion
Accommodation is easy to come by around Zion, even during some of the peak seasons. The Quality Inn Montclair (Choice Hotels)![]() was our hotel of choice and offered good-sized, well-kept rooms with free breakfast, WiFI, and access to the pool and hot tub. The staff throughout the hotel were friendly and efficient. I’ll be staying here again.
was our hotel of choice and offered good-sized, well-kept rooms with free breakfast, WiFI, and access to the pool and hot tub. The staff throughout the hotel were friendly and efficient. I’ll be staying here again.
If you prefer a more rugged experience, many visitors opt to camp in Zion. The best campground to stay at is Watchman. It’s conveniently located near the Southern canyon entrance to the park and is within walking distance of the Visitor’s Center. It’s also a stone’s throw away from the shuttle buses.
If neither of these suits your fancy, take a look at some of the best hotel deals in Zion![]() for as little as $50 a night on TripAdvisor.
for as little as $50 a night on TripAdvisor.
Unique Tours, UTVs, Guided Experiences, Sandboarding & Canyoneering
Beyond exploring and hiking through Zion, there are a number of companies that offer some pretty special (and highly rated) experiences you can schedule ahead of time. We list out some of our favorites below. Everything we suggest has received nothing less than 5 stars.
If you’re looking for an outdoor adventure but want to avoid Zion National Park and the huge crowds that come with it, this Peekaboo Slot Canyon Sandboarding and UTV Sunset Adventure is the perfect solution. With your own private group, ride in an ATV up to Peekaboo Slot Canyon, and then sandboard on the dunes while the sun sets over the area.
If you’ve ever wanted to try canyoneering, Zion offers the perfect location to do so. East Zion Experiences will take you on a 4-hour, expertly guided adventure through several gorgeous slot canyons. Gear is included, but if you’re visiting the area during the winter months, do be sure to pack gloves, a hat, and layer warm clothing.
To get off the beaten trail, avoid crowds and see some aspects of Zion National Park that the public usually does not, consider a half-day tour with Zion Canyon Boneyard. Candace will help customize your trip, which can include a visit to a ghost town, ancient petroglyphs and stops of your choosing around Zion.
Trail distances, timing and additional information courtesy Zion National Park.
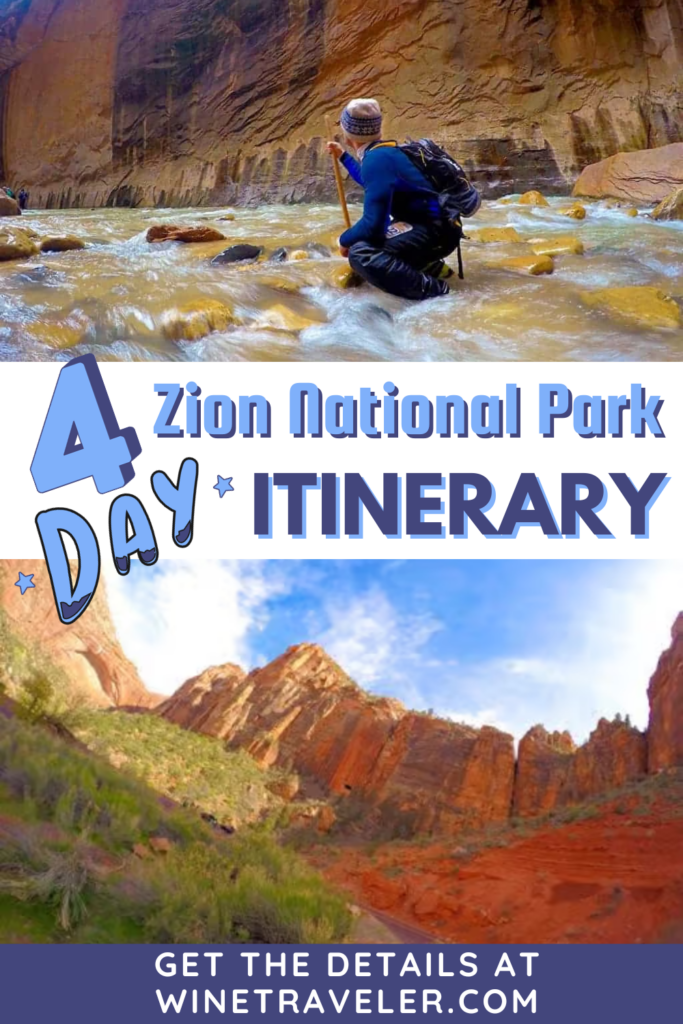
Pin This Zion Itinerary & Travel Guide for Later on Pinterest
If you enjoyed this guide, consider joining the Winetraveler Facebook Group to connect with other Winetravelers and for additional travel inspiration around the world.
Collect your Winetraveler passport — tap the regions & grapes you’ve tasted. Your stamps follow you across the whole site.
- Curious1 stamps
- Explorer3 stamps
- Connoisseur6 stamps
- Sommelier12 stamps
- Vigneron20 stamps
Your stamps are saved on this device.